How to Pick a Telescope
January 10, 2018
You want to buy a telescope but you don't know where to start? SMO Kirkpatrick Planetarium Director Tom Arnold has advice!
Is picking up a new hobby one of your new year's resolutions? Astronomy can be an extremely fun and exciting one — it’s one of the few sciences where your backyard can become a living laboratory, filled with the most exotic objects humans have ever discovered! They're all in the sky waiting to be viewed by the person with a desire, imagination and a good telescope.
A question we're often asked at Science Museum Oklahoma is how to select a telescope for a budding astronmer whether young or old. SMO's Kirkpatrick Planetarium Director Tom Arnold offers this guidance:
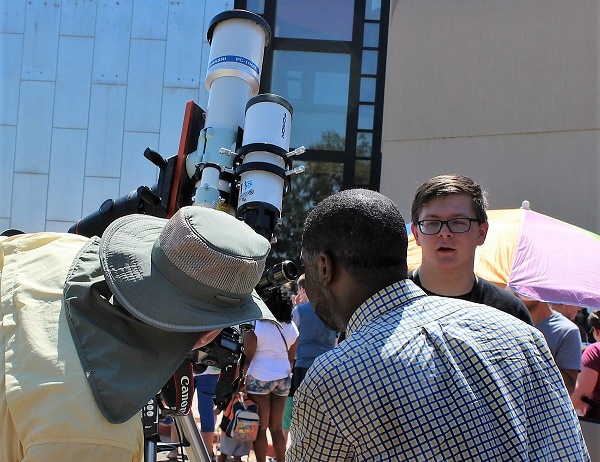
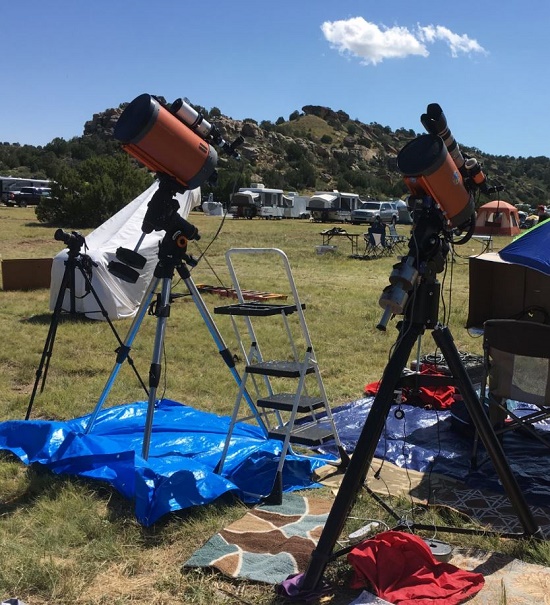
operates a telescope during the 2017 solar eclipse viewing
event at Science Museum Oklahoma.
Buying the Right Telescope
Selecting a telescope can be a daunting task no matter if it's for a child or an adult. The good news is that there are some basic principles one can use to make the right choice regardless of the end user.
Selecting a telescope for a child requires a bit more consideration because cost vs. age is such an important issue. Selecting an instrument based on cost alone can lead to disappointment and frustration which could destroy a child's interest.
The correct balance between cost and quality need to be met and there are some basic rules of thumb that can help.
What Not to Do
Before getting into the different types of telescopes, the most important factor to remember is that the “POWER” rating found on many low-end instruments is extremely misleading. Power has nothing to do with what you can see or the quality of the telescope. It is used to get people to buy the telescope thinking that the higher the power or magnification the better the instrument, when the opposite is most likely correct.
Quality optics can be found in small instruments up to the largest observatory class telescopes. Yet matching the instrument to the observer and its planned use is where one must start. For a first telescope, most want an instrument that will give the user a clear and sharp view of the moon, planets, and brighter deep sky objects. Unfortunately there is a trade-off, even with these simple requirements — the trade-off is based on something called focal length.
The Importance of Focal Length
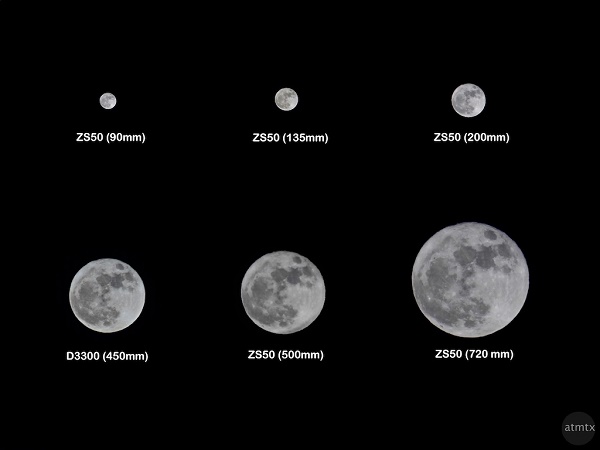
Notice the image size of the objects at different focal lengths in this figure. This is what a telescope of that focal length will produce without the eyepiece installed.
Without going into extensive detail, focal length is a measure of how strongly the system converges or diverges light. The longer the focal length, the more detail that can be seen in an object. Unfortunately the trade-off is loss of light.
Although good for bright objects like the moon and planets, a longer focal length is more limiting on faint objects like nebula and galaxies because more light from the object being observed is required to see faint visual detail.
Focal length is also a function of the eyepiece being used with the telescope. We will discuss this later. All this means that a first time telescope buyer must decide what is more important: bright objects or dim objects. Your purchase will depend on the answer.
Refracting Telescopes
A refracting telescope normally has a longer focal length: F8-F15. The higher the F-number the dimmer the image but the greater the detail. This means that looking at the moon, which is very bright, will yield increasingly greater detail. This would probably be a good choice for a child's telescope.
The quality of the optics is another important consideration. If the lenses are plastic or poor quality glass, everything you see will be blurry no matter what the F-Ratio. In order to judge this, check to see if the optics are defined as either achromatic or apochromatic. These mean the lenses transmit color correctly with no distortion, with the apochromatic telescope being the best refractor of all and the most expensive. If the telescope is neither of these types, your images will probably be surrounded by a rainbow of color and very distorted, making the view very disappointing to see.
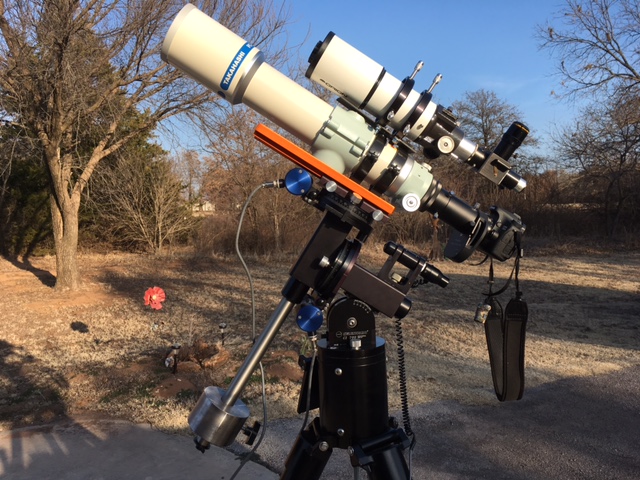
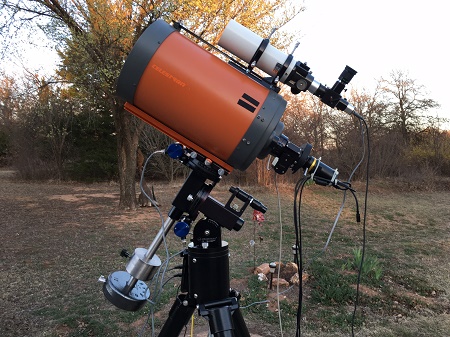
The small telescope on top is an 80mm refractor for fine guiding during long exposures. Photo by Tom Arnold.
Always be aware that in astronomy, telescope size is everything, with bigger always being better! This is because a telescope can be thought of as a “light bucket,” designed specifically to capture as much light from faint celestial objects as possible. Refractors can be easily found with objective lenses, the primary lens in the front of the telescope, from one inch to six inches. Yet reflecting telescopes can range from four to twenty inches or more, much larger and able to capture more light from faint objects!
It's for this reason that astronomers use reflecting telescopes to study the universe. The trade-off here is that in order to get high detail in distant astronomical objects, you must have a large instrument to accomplish it.
Reflecting Telescopes
The basic form of the reflecting telescope is the Newtonian. Unlike the refractor, the Newtonian uses mirrors to gather the light and bring it to focus at the eyepiece. Reflectors don't suffer from the chromatic distortions like refractors, therefore the buyer need not search for the same characteristics as those previously discussed.
The Primary Mirror size of a reflector is the measure to gage how faint an object can be seen visually with the instrument. The focal length of these instruments are within a wide range F2-F20 or more. A telescope working at F2 would provide a very wide field of view and capture a lot of light quickly, allowing the visual observer to see large scale, faint objects like the one seen below.
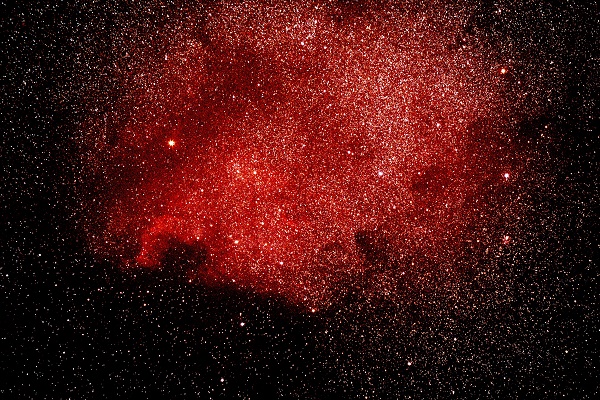
This object can only be seen with a very large telescope or one with a very low focal length: F2-F4.
Photo by Tom Arnold.
Although color won't be visible to the observer unless the instrument is very large, the glow of the nebula and some of the fainter stars will be visible in a smaller instrument with a low F number. In order to obtain an image like the one seen here, a long exposure photograph is required. This adds a major level of complexity to the equipment required and proficiency of the user.
Detail in faint celestial objects using a reflecting design can be achieved by raising the F number to F8-F10. Here the visual observer will be able to see a high degree of detail in objects like the moon and some planets.
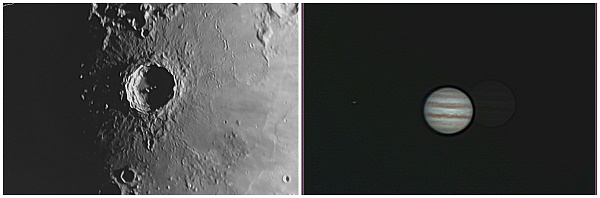
Right, Jupiter through an 11-inch reflector at F10. Photos by Tom Arnold.
Types of Reflecting Telescopes
The Newtonian design is widely used today and can be a good choice as a first telescope. A good example of this is the Dobsonian reflector. This is a low-tech instrument but normally has good optics providing an enjoyable experience to the budding astronomer. They are also not very expensive and should fit into most telescope budgets without having to take a second mortgage on your home! They are good for deep sky observing, providing a relatively wide field of view from their focal length which normally range between F7-F8. Yet they can also provide some degree of detail on the moon and planets as well.
Another popular design of reflecting telescope is the catadioptric design which is a folded optical system based on mirrors and a glass corrector plate. These instruments are considerably more expensive than the Dobsonian but provide a wider range of objects that can be observed.
Normally they are found within the F10 range of focal length and are good choice for visual observing of the moon and planets. On faint deep sky objects they are a little more challenging due to their focal length. An 8-inch telescope of this type can form the foundation of a collection of instruments which can last a lifetime, serving many purposes.
Eyepeices
The other important part of telescopes are the eyepieces. Eyepieces bring the light to a focus allowing the observer to see an object. There are many different types of eyepieces, but it is always a good idea to have a wide field eyepiece, 40mm focal length, and a narrow field eyepiece, 20mm focal length available to obtain the widest performances from your telescope.
Here it is very important to remember that the visual performance of the telescope is based on its useful range of focal lengths. This range is based on the focal length of the instrument along with the focal length of the eyepiece. Most telescopes will begin to lose clarity with eyepieces less than 18-20mm focal lengths. Therefore unless you have some eyepiece for a specific purpose, a higher focal length eyepiece probably is best.
Quality optics apply in eyepieces the same as they do in telescopes. As a rule of thumb, the cheaper the eyepiece that worse the optics. It is true that you get what you pay for. However most telescope purchases include at least one eyepiece to get you started. These are normally of sufficient quality as to provide an acceptable visual experience.
Telescope Mounts
Observing should be easy and comfortable, attributes that are provided by the telescope mount. Most people looking for a first telescope often overlook this extremely important aspect, not realizing that a good telescope mount is perhaps more important than the telescope itself! Let’s look at why that is.
Assume for a moment that you have spent the last 20 minutes attempting to locate an object in the sky, straining your eye to see it and making minute adjustments to the telescope to center the object correctly. Then, seemingly from nowhere, the telescope mount slips dramatically and the object you have worked so hard to see is lost! This is the situation you can experience with a mount that is unable to carry your telescope or that is not well built.
Two basic types of telescope mounts are available: Alt/Az, which move up and down and side to side and Equatorial mounts which are designed to compensate for the earth's rotation to follow celestial objects.
The Dobsonian design uses an Alt/Az, (Altitude and Azimuth). They are the simplest design for a telescope mount, but hey can still be difficult to move smoothly and have a hard time remaining in the desired position when stationary. The balance of the telescope has something to do with this, but it may also be due to poor mount quality. Before purchasing a telescope like this, be sure to see how smoothly it moves and be equally sure it will remain in given position when stopped.
An Equatorial mount is designed to follow the sky. The simplest version uses manual controls to move the instrument like the one seen here.
Pointing the mount axis at the North Star will provide the user the ability to make small manual adjustments to the mount allowing the user to observe an object for an extended period of time.
The next version of the Equatorial mount is the GOTO mount. These are much more expensive and provide a wealth of things to see with the telescope by the simple push of a button.
As a first telescope, cost and the knowledge of the user are a consideration since GOTO telescopes instruments start around $1,000 for a good used instrument.
Ok ... Now What?
There is a lot to consider and understand when buying a telescope. For a child just starting out, a small achromatic refractor, around 80mm (3.2 inch) diameter on an alt/az mount is appropriate and can be purchased from around $150.00. This instrument will provide clear, wide, yet bright views of celestial objects that will inspire for years to come. In addition this telescope can be used later as a finder on a larger instrument, serving the owner for many years.
For the person who would like a little more aperture to their telescope, (size does matter), the Dobsonian is probably a good choice. Locally you can get an 6-inch/F8 for around $300 or an 8-inch/F8 for about $400. These are good general purpose instruments that will delight the casual observer for many years. In time the owner may wish to remove the Dobsonian from its alt/az mount and place the instrument on an equatorial mount for more in-depth observing. This will always be an option. From here, prices go up considerably as larger and more sophisticated instrument are needed!
Where to find and buy a telescope is important. Doing an internet search for telescope stores, you can find local and mail-order suppliers across the country. What's more, they often do have people that can assist your purchase over the phone, answering specific questions about how their inventory fits into your needs and budget.
Clear skies to all!
###